ForeUI is an easy-to-use UI prototyping tool, designed to create mockup / wireframe / prototypes for any application or website you have in mind.

All posts by xavier

Batch Changing Image Reference

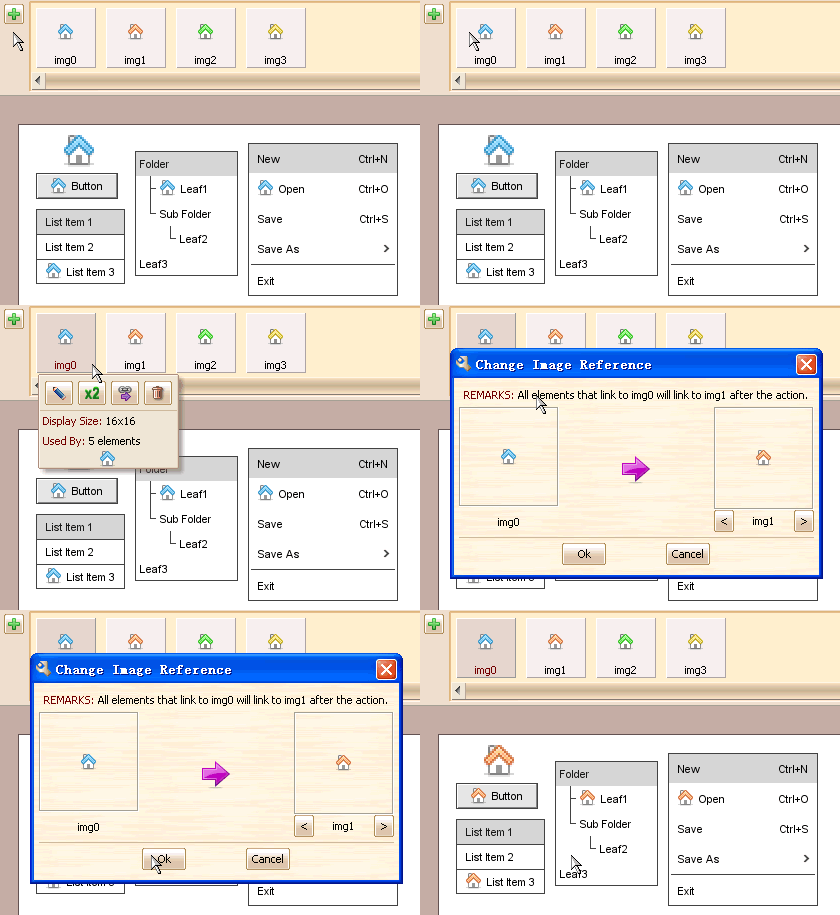
Today I’d like to introduce an interesting feature in ForeUI: batch changing image reference.  Sometimes we have used an image a lot in a plot, but want to change it to another image.  How can we achieve that?  Changing the image reference one by one?  It works but very time consuming.  In this case we need to use the batch changing image reference feature in ForeUI.

Let’s expand the image dock by clicking the  button, then click the image that we want to change, a popup menu will be shown and we can find a  button on it, then we click it and choose the target file we want to change to, that’s all.  The GIF animation below shows the details:   change_img_link

ForeUI V1.00 Released!

3

It’s my pleasure to announce that ForeUI V1.00 is released today!

By releasing alpha and beta version of this product, we got a lot of feedbacks, thus we can improve this product a lot in the official release.  Hereon, we must offer our heartfelt thanks to all friends that gave us feedbacks.

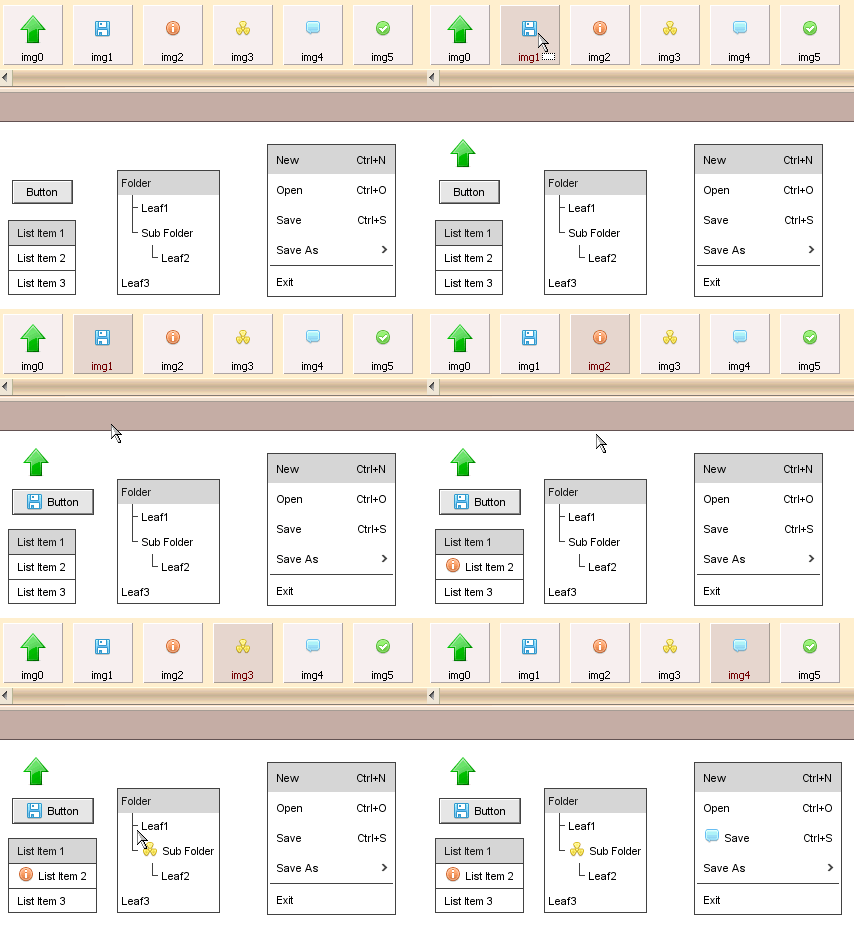
Comparing with beta, there are lots of enhancements and new features present in this version.  The most interesting one is the image drag and drop feature.  I have post a blog about image usage in ForeUI before, now it will be more flexible to use image by drag and drop feature:  it allow us to drag image from image dock to the plot, the image can be drag into element too.  The GIF animation below shows the details:

drag_imageOf course, as we promised before, the Mac OS X UI theme is available in this version.

I will keep writing blogs to introduce some interesting features in ForeUI.

Mac OS X UI Theme Preview

The development of Mac OS X UI theme is finished and we are testing on it.  Now let’s have a preview first:

mac_os_x_theme

We believe this kind of UI themes are very useful when making design document, since it is very close to the final result, developers can follow up and implement the UI with its help. 

The Mac OS X UI theme will be available in the offical version 1.00, which will be delivered next week.

ForeUI Beta Version Released

I am happy to announce that ForeUI beta is released today 🙂

What’s new in this version?  Comparing with alpha version, there are many new features and bug fixings, I don’t want to list all of them here.  The most important difference is that we can use a new UI theme: Windows XP

We can switch the UI theme of our design with just 3 clicks:  Click the combo box to show the themes list; Click the target UI theme; Finally click the “Apply” button to take effect.  The following two figures shows the key points.


Using Images in ForeUI

1

When we create UI prototype for our product with ForeUI, we may need to use some images (for example, icons in menu).   ForeUI provides a very flexible and easy way to manage the images within the mockup, there is an “image dock” for every mockup, which will maintain all used images. 

The image dock is hidden by default, since we don’t need to work on it directly  in most cases, but it is working silently  in the background.  It just like a storehouse, caching all images that used by any element.    Each image in the dock will have its own identification, any element that use this image is actually link to its identification.   For example, a button use the image with “img1” identification as its icon,  you can insert the “[img1]” at the beginning of its text, and ForeUI will recognize it and show the image as the icon of button.

edit-button-text1

Yes we can input that “[img1]” in the button text to assign an icon for it, but we don’t have to do so,  since we have more convenient approach:  specify the image in the floating tool panel, see the figure below:
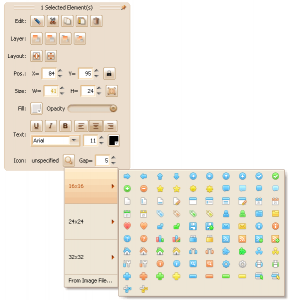
specify_image

We don’t have to understand how the image dock works, we just choose the image we need, ForeUI will take care of all the rest.  We can check the image dock at any time, just click the “Image Dock” button on the top-right corner of the plot, we can see all used  images:
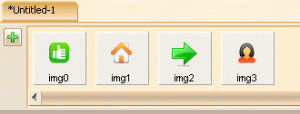
 imagedock_list1

You can single-click each image in the list to see what can we do on it, also you can double-click it to make some processing on the image.  Remarks:  Once you make change on the image, all elements that use this image will be updated automatically.