Although we have the online documents for ForeUI, many new users still wish to have more detailed tutorial. Today I will create a (working) icon search engine with ForeUI, and I believe it will be very interesting! I will give the icon search engine a cool name: ICOOGLE. It is a combination of two words: “Icon” and “Google” 
Create the GUI
There will be two pages to create:
- Home page that allows user to input parameters for searching.
- Result page that display the current page of results. This page can also accept user’s new search request.
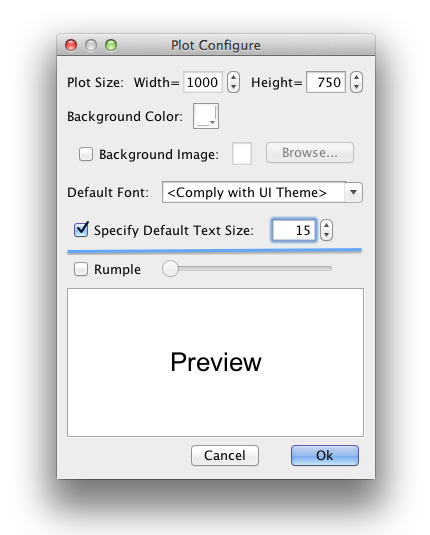
Create a new plot, and set its page size to 1000×750, via the “Plot Settings…” button on the bottom right corner. Now we are editing the first page (home page).
Drag a Text Box (text label) element from the element list on the left, and drop it into the page. Double click the Text Box and change its content to “ICOOGLE”, set its font size to 65, use bold font, change text color to light blue, set elements size to 350×70, vertically and horizontally center the content, and move element to (325, 200). This will be the logo, as shown below:

Drag another Text Box, a Text Edit Box and a Button element into the page, set their font size to 16, and set their height to 28, then align them in the same line, and put them in under the logo. Here is how the home page looks like:

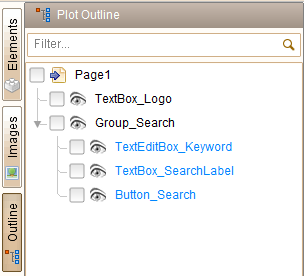
It will be better to rename the elements with some meaningful ids, so we can easily find them when defining the behavior. Don’t forget to group the “Search Icon” label, the Text Edit Box and the “Search” button together, this will help us to reuse it in the second page (using Reference). Open the outline view by clicking the “Outline” button on the left bar, you should see the outline like this:
Click the  button at the bottom to open the page management view, set the current page title (on the right of the view) to “Home Page”. Click the
  button to add a new page, and set its title to “Results”. The newly created page will be selected automatically, so now we can edit its content.

Now we are goint to make use of the Reference element. The Reference element is quite special: it can simulate the look and functionality of another element (which is called “reference target”), this can help us to reuse the previously defined elements to build new content.
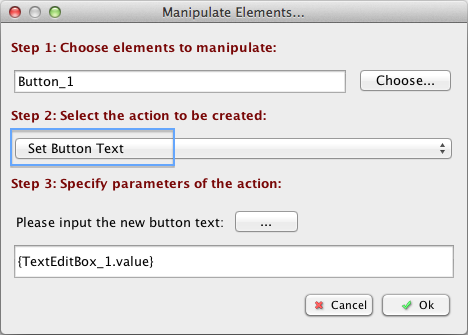
Drag a Refernce element from the element list into the result page, then click the  button in the tool pane to specify the reference target. You will see this window:
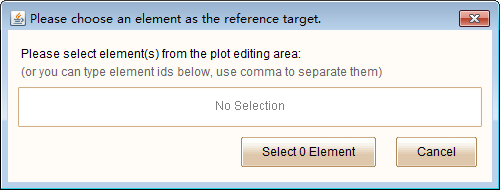
Once you see this window, you can browse to any page to pick the element you want, as the reference target. Here I will choose the logo text box, because I will also need the logo in the result page.
Adding another Reference element into the page, and set its target to the group we created before (so it will emulate the entire searching function block, fancy :D). Rearrange the position of these two references and adding a horizontal Line element to finish the header of the result page:

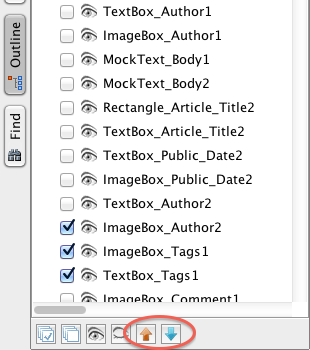
The results page will display 10 results per page, each result will be displayed in an iFrame element. So we need to create 10 iFrame elements, set there default size to 64×64, and layout them in two rows (5 elements for each row). You can make use of the alignment buttons ( ) and layout buttons (
 ) in the tool pane to do it quickly. Could not find these buttons? Try to select 2 or 3 elements together to show them
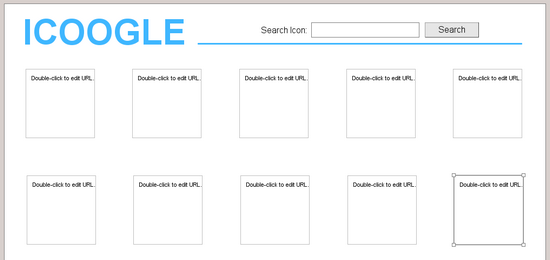
Finally, we add two Button elements and one Text Box element to create the pagination bar on the bottom.
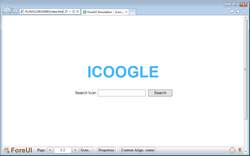
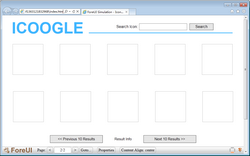
 Now we have finished the GUI creation. Although no behavior is defined yet, you can still run the simulation and browse the two pages via the navigation bar.
Prepare for the API Calling
As I said, I will create a working icon search engine with ForeUI. I could achieve it thanks to the possibility that ForeUI could talk to the web service via JSONP API.
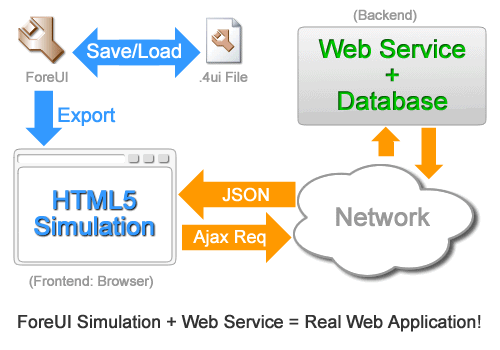
In this example, I will use the JSONP API provided by IconFinder. You can find more details about this API here. In order to use the API, you will need to sign up on IconFinder and get your own API key. For testing purpose, you could temporarily use our API key (8b3d4114b9994b188cef5bcef9765444).
The API will return a JSON object like this:
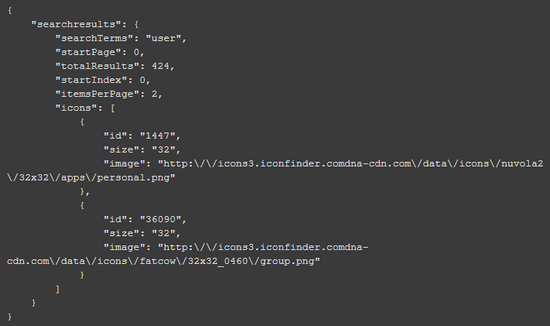
That means we can get total results number (the “totalResults” field) and all icons’ information (the “icons” array field) from the JSON object, which can make ICOOGLE functional.
Define the Behavior
Behavior definition is very interesting, and could be challenging in some cases. Since ForeUI allows you to define behavior in a simple and direct way, you don’t have to be a programmer. However it will be better if you could think like a programmer, since that will help you to make neat design of the behavior.
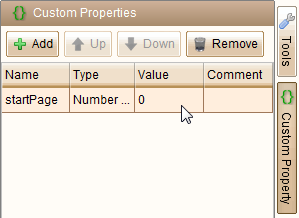
First we need to define a custom property to store the current page. We will include this property value in the URL for calling the API. The custom property can be defined in the custom property view, which can be opened by clicking the “Custom Property” button in the right bar.
The main logic of this web application is to call the JSON API and retrieve the icons’ URLs. We will need to call the API when:
- User click the “Search” button in the home page.
- User click the “Previous 10 Results” button in the results page.
- User click the “Next 10 Results” button in the results page.
We can let these three cases to share the same behavior, with different parameter (the page index and searching keyword). So I defined a global custom event and put the searching logic into its handler. This is very similar with the “function” concept in programing world: Three buttons will call this “function” to do the searching.
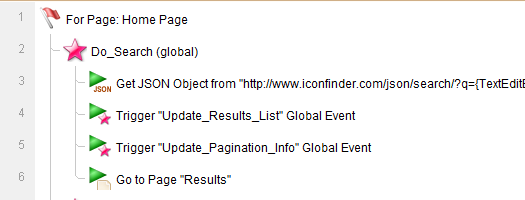
As you can see I define this “Do_Searching” custom event for the home page. Since it is a global event, it could be triggered in any place, so it is not a must to define it in the home page. The most important part is the “Get JSON” action. It should be defined like this:
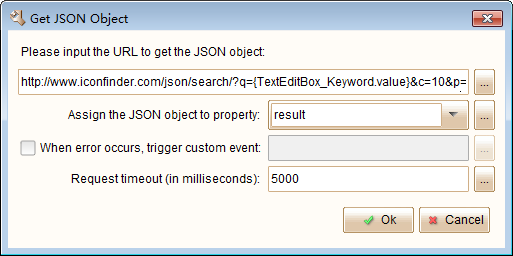
The actual value of the URL is:
http://www.iconfinder.com/json/search/?q={TextEditBox_Keyword.value}&c=10&p={startPage}&min=1&max=64&api_key=8b3d4114b9994b188cef5bcef9765444
You can see the keyword and the page index is included in the URL. This API call will return a JSON object, which will be assigned to a custom property named “result”. That means, when the Get JSON action finished, we will have a custom property (with “object” type) that includes all needed information for showing the result.
As you can see, there are two actions to trigger another two custom events (line 4 and line 5): Update_Result_List and Update_Pagination_Info. It is not a must to define these two custom events, since you can put their logic into the Do_Search event handler. The reason that I do so is to make the structure more clean. The triggering of another custom event is quite similar with the “function call” in the programing world. The final step is go to the results page, using the “Go to Page” action (line 6).
Here is how the “Update_Result_List” event handler looks like:
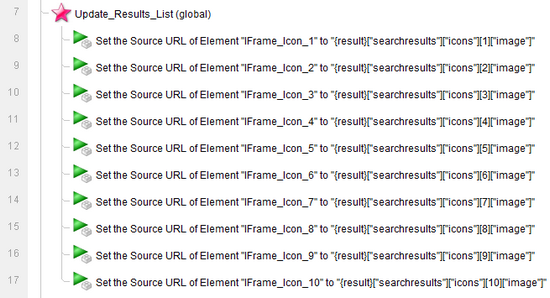
It is just getting the icon URLs from the “result” object, and assign them to the iFrame elements (so you will see the icon in results page). Keep in mind that arrays in ForeUI is 1-based, so first member in array is array[1].
And here is the “Update_Pagination_Info” event handler:
 It makes use of the information in the “result” property and constructs the current paging information.
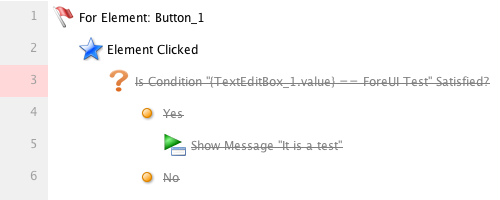
So far we have define the main logic of searching, but no one is using it yet! We need to handle the “Element Clicked” event for all the three buttons and trigger the “Do_Search” custom event in the event handlers.
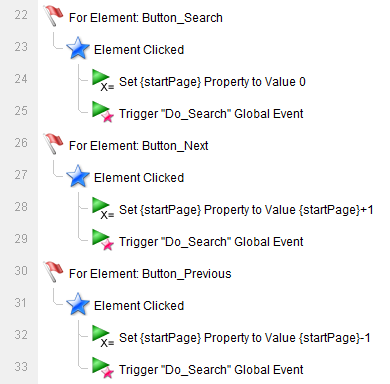
It is very easy to understand what they do: set the “startPage” property before doing the search, then we will get different results.
Now we have define the basic behavior of the web application. You can run the simulation, input a keyword, press “search” button, and you will see the icons listed in the results page, you can even switch pages.
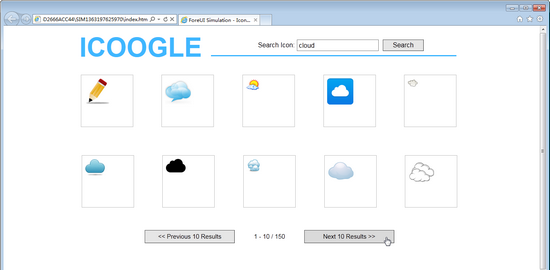
Could you believe that? We have not defined any behavior for the search box in the results page, but it is working fine! That is the magic of the Reference element 
Make It Even Better
ICOOGLE is working, but it is not good enough. Here are some disadvantages:
- Can not press ENTER to start searching
- No limitation to the “Previous” and “Next” buttons (could go to unreasonable page that has no result at all)
- Icon border does not match the icon size
- The icon list should be cleared before listing the result, otherwise the icon from previous searching may be kept in the result page.
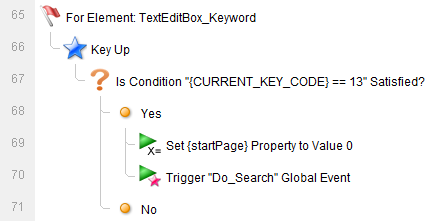
In order to start searching after pressing ENTER, you will need to handle the “Key Up” or “Key Down” event for the Text Edit Box element, and check the CURRENT_KEY_CODE system property value. If the value is 13 (the code for ENTER key), we will execute the same logic with the “Search” button. PS: all possible system properties are listed in the system property view, which can be opened by clicking the “System Property” button on the right bar.
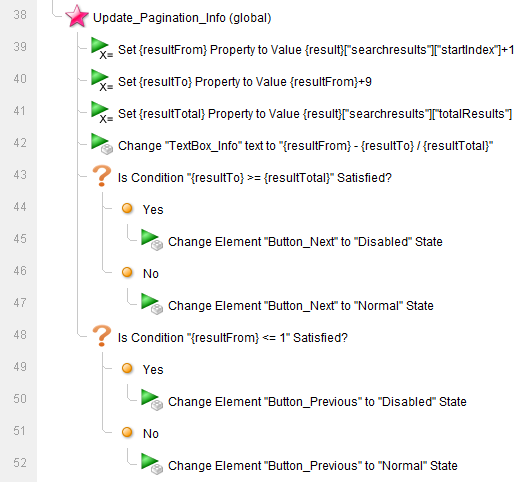
Also I modified the “Update_Pagination_Info” event handler a little bit to enable/disable the “Previous” and “Next” buttons according to the current showing range: if the first listing result is less than or equals to 1, the “Previous” button will be disabled; if the last showing listing result is larger than or equals to the total number of results. The “Next” button will be disabled.
The icon border is actually from the iFrame element, so we will need to resize the iFrame element according to the actual icon size (reserve 20 pixels as padding).
Simply set the source URL of the iFrame element to “about:blank” will clear its content.
There is a tricky thing: the JavaScript engine will meet error and stop the behavior if the icon information does not exist. This could happen if you go to the last page of the searching result, ICOOGLE tries to fill all the 10 iFrame elements with icon information, but it could fail since the last page may contain less than 10 results. To avoid this, the standard way is to check if the icon information exist before using it. This will add many conditional branchings, which I don’t like so much. Here I use a small trick: execute necessary tasks before trying to list the icon. Specifically, I trigger the “Update_Pagination_Info” event before the “Update_Results_List” event since the later one may meet JavaScript error.
You can run the simulation directly from this link. You can also download this example plot in ForeUI store.
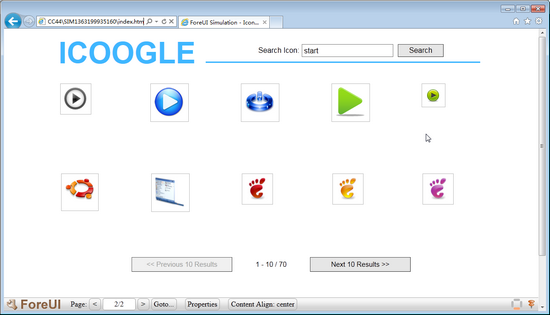
Here is the final view of ICOOGLE:
This is a really long post. I hope you enjoy it 
I’d like to use this tutorial to show what can be done with ForeUI, and attract more and more users to try the advanced features in ForeUI.
PS: ForeUI is still a prototyping tool, although it could be used to create the frontend of real web application. You can just use the basic features to create fast prototyes of your web site or software. If you wish to get higher fidelity of the simulation or even use it in production, ForeUI is ready for that.

