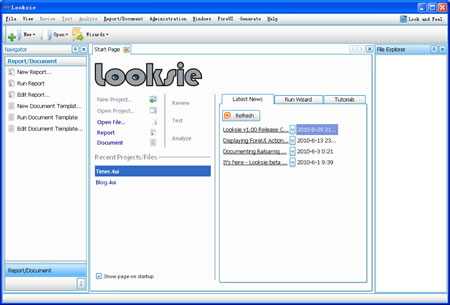
Looksie is a desktop tool that focuses on improving the entire prototyping process from design through to test. XemWare Limited, the developer of Looksie contacted us about eight months ago and we were all excited about the future of prototyping technology, then we setup a firm cooperative relationship. Looksie V1.00 is launched on September 1st and I am happy to introduce this promising product to you. Below is the main GUI of Looksie:
Looksie is integrated with ForeUI and help you to do some interesting things on your prototype, including:
- Generate configurable report for given prototype
- Generate configurable Word/Excel document for prototype
- Find/Replace text strings in ForeUI plot
- Generate ForeUI plot from database
There are more exciting features under development, such as generating plot for existing web site and testing system for prototype etc. In this article I will mainly focus on the report generation and report design features of Looksie.
Report Generation
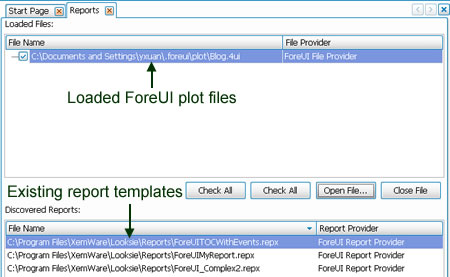
This feature will be quite useful if you have a complex prototype and need to review its details. Looksie already provides some finished report templates; you can use them to generate the report for your ForeUI plots on hand. To generate the report, just click the “Run Report” item in the “Report/Document” list in the Navigator, then a new “Reports” page will be opened and you can see two lists on it. The upper list is for the loaded plot files, you can open as many plots as you need and generate the report for all of them. The lower list is the report templates discovered by Looksie, you can choose a template and click the “Run Report” button below to generate and view the report.
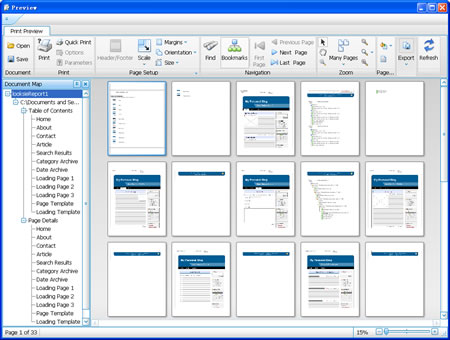
The report preview window will shows up once you click the “Run Report” button. In this window you can review the content report page by page (just like browsing a World document). You can save the report to .prnx file so that you can open and review it with Looksie. You can also print the report to papers or export the report to many formats, such as PDF, HTML, RTF, XLS etc.
Here is a step-by-step tutorial of report generation on Looksie official web site, which is really helpful.
Report Design
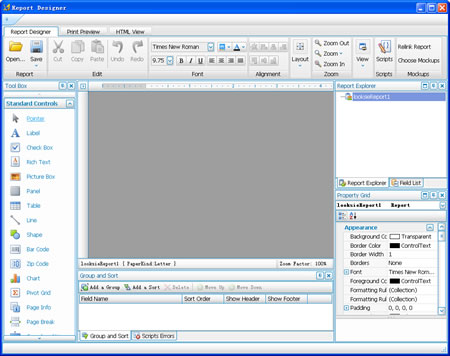
The most exciting thing is that you can create your own report template! You can design how your report will look like, from content to layout, to coloring etc. To define a new report template, just click the “New Report…” item in the main GUI, then choose the “ForeUI Report Provider” to continue, the report designer will be opened.
The report designer is very powerful. It allows you to create the report structure from scratch. However you need to know more about the report structure and ForeUI plot data structure to use the report designer.
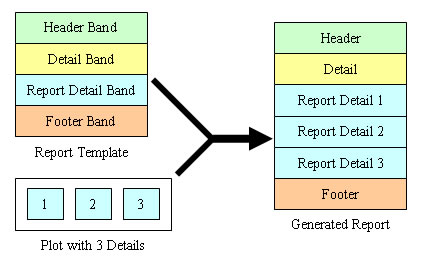
In the report designer, a report consists of multiple bands, and all bands have the same width (equals to the page width). For example, a report can have a header band, a detail band and a footer band, and each band can have multiple child bands below it. Here is a figure that showcases how a report is generated with given report template and plot. As you can see the report detail band will be repeated automatically if it is bound to a collection of details. Since the report detail band can be nested, it can represent really complex data structure. You can always browse the band hierarchy in the Report Explorer on the right in GUI.
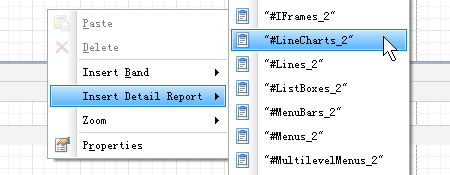
The gray region in the center is the report editing area. We can right click this area and trigger the context menu, then select the band to insert. When inserting report detail band, you can also specify the detail collection to bind, the collections has a name that starts with “#”.
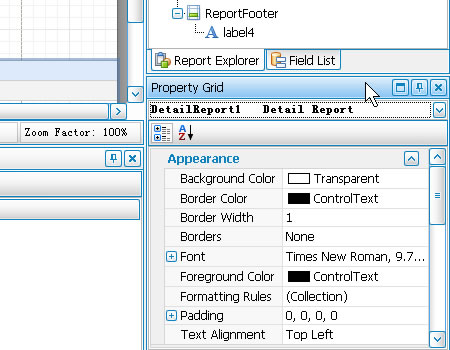
Tweaking the band is very easy, you can drag the bottom of a band to adjust its height, and you can also change its properties in the Property Grid on the bottom right corner.
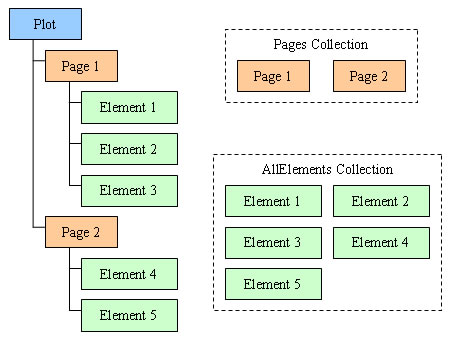
Before using the report designer to create your own report template, you should also know some details about the data within a ForeUI plot. A plot contains some simple attributes like width, height, background color etc; also it contains some collections for complex data. Such as the collection of all pages in the plot, the collection of all elements, the collection of all events etc. The figure below shows the basic hierarchy structure of plot data:
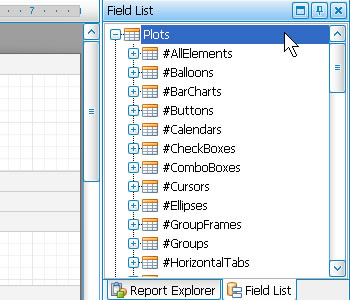
In the report designer, the data of plot is mapped into fields, which can be reviewed in the Field List on the right. In the list, a collection will have a name starts with “#”. For instance, the #AllElements is the collection for all elements in the plot. As you can see, there are many collections fields available in the list, so that you can bind them with detail report bands as you need. You can even drag the field into the report area directly, the report design will smartly create suitable component and bind with the field.
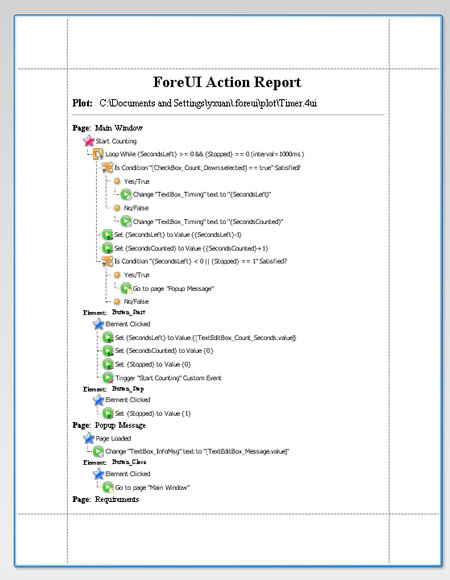
Creating new design template is kind of complex but also interesting. Here is a detailed tutorial on Looksie web site, which helps you to create a new report template step by step. After finishing a template with the guidance from tutorial, I think I could really create something I need. In the ForeUI support forum, the ability to print out all behavior definitions is required here and here. It is a shame that after so long time we haven’t provide this feature yet. However it seems that we could do this with Looksie now. I worked on it for one hour or two and created a report template for behavior printing. Below is the preview of the action report for “Timer.4ui” example plot.
Summary
The report generation and report design feature is quite useful for ForeUI plot reviewing. Although the report designer is kind of complex for the beginners, it could be improved by providing more detailed documents and tutorials in the future. As a newly launched product, Looksie is good enough and worth trying out.
